Monday 24 November 2014

Top 5 Funniest Gender Equality Vids

In the honor of brilliant young actress Emma Watson's epic #HeForShe speech at the United Nations (that you can watch HERE if you've missed it), and to keep the momentum  going, I thought that I'd share with you a few hilarious stands from inventive people. 

Gender inequality is still today a worldwide current issue that affects women's lives on a daily basis, as well as men's. 
To our male friends, I ask: do you wanna be perceived as the insensitive, systematically oppressive and emotionally repressed, sex-obsessed gender by the generations to come? Don't you think that is a very limiting and reductive cliche of the male community? 
Do you wanna keep wondering if your girlfriend/wife/daughter/sister/female friend will be safe on her way home? 
Do you wanna teach your son or your daughter what he/she can or cannot wear/play with/do in order to be considered "appropriate", "decent", "attractive", or "manly"? That they cannot fully express themselves the way they wish because appearances matter most? That they should be held responsible for other people's reactions, bullying acts or sex crimes? 
Do you want a pointless and unproductive "battle of the sexes" division of the world to go on forever with no positive results for either party?
Take a stand for a better world today, and in your daily behavior.


So without further ado, enjoy my

Top 5 Funniest Gender Equality Videos


The Best Sketch Award goes to:

this fake ad with French actress Marion Cotillard.

The secret trick to make a man respect you!


The Stand-Up Comedy Prize goes to: 

Ellen DeGeneres on Bic Pen. 

Newsflash: Bic just launched a line of pens FOR WOMEN! FINALLY!


The "Truth Comes Out Of The Mouths Of Babes" Award goes to: 

these lil' princesses vision for a better world.

Because FACTS are more shocking than WORDS.


The Musical Stand Prize goes to: 

Lily Allen for her feminist anthem's marvelously sarcastic video clip!


Aaaaand the Satire Prize goes to: 

this Blurred Lines parody!

Every bigot shut up! #Scholastic #NotFuckingPlastic #Liberation


Let me know if you come across other gems of the genre! 

Tuesday 18 November 2014

Easy No-Sew Knotted Tutu Tutorial

A few weeks ago, I made a tutu skirt myself for the first time. The whole craft took me maybe an hour. It's a great way to make a cheap skirt for costumes.
It was surprisingly easy, so I thought I would share the process with you!

You will need:

  • Tulle spool of the colour of your choice, enough to make your skirt (see Step 1)
  • A ribbon / an elastic band / an old belt for the waistline
  • Measuring tape
  • Scissors 
  • Some space and a chair as support (optional)
  •  

STEP 1: Choose the length of your tutu


Measure how long you would like your skirt to be, from where the waistline will be to the end of the skirt.
My tip: if you want a very long skirt that falls to the floor, as I did, think of the shoes you're gonna wear it with. I planned on wearing heels and so I measured the length wearing the heels so I would know where it would fall, as long as possible but not that long that I wouldn't be able to dance with it.

Once you have the length, double it: that measure is how long the strips of fabric have to be to achieve your desired length.
Plan for enough strips to tie all around your waistline.
I used 24 strips, but you could use more or less according to your size, and how transparent or full you want the tutu to be.

My tip: you should measure these factors before buying your fabric, so you don't find yourself short of material. If you're not sure, make your tutu in advance, to have the time to order more fabric.

STEP 2: Cut your strips of tulle


Remember each strip has to be TWICE as long as your desired length for the skirt.
My tip: As this was pretty long for me, I simply unrolled the spool on my bed (a table would do) next to the measuring tape, cut it at the end, and then repeatedly unrolled the spool on top on the first strip to cut the next ones on the same length.

If you are not sure how many strips you'll want, don't worry, just cut a few to begin with and come back to it later.

STEP 3: Start your skirt


My tip: You can use a chair as support for easy knotting, but that is not mandatory at all if you don't have one. If you decide to do so, simply tie your elastic band / ribbon / belt around the back of the chair as if it was your waistline, and you're set!


Your first knot:
Take your first strip, fold it in half - yes, that's why we took double the desired length! - and hold it by the fold, aka by the loop.
Pass it under your ribbon / elastic band / belt waistline and put the two loose ends of the strip inside the loop. Pull - it's done!


STEP 4: Knot & repeat


Repeat the same knot with all of your strips. It is very easy to push the strips around, especially if you're working with an elastic band  or belt, to make space for the new ones.


STEP 5: Try it on and finish the skirt 


Your skirt is pretty much done! 


Only a few steps left to make it perfect:
Turn the waistline around to show the other side of the knots. (It looks prettier.)


Check on yourself that it fits and that it's full enough for your taste. You can add or remove strips to suit it to your needs.
Once it looks just as you like it, finish the waistline: tie the ribbon or sew the elastic band to fit you, or check that your belt fits well. You can slide the knotted strips around to make sure the volume is the same all around.

TADAA! Your Tutu is done, congratulations!


Thursday 13 November 2014

Halloween costume II : Masquerade Ball Queen

On Halloween week-end, I was invited to a Masquerade Ball. Now my boyfriend calls me his Queen, so there wasn't really any doubt on the costume, especially once I flashed on one of the pieces of my costume - that's often how I start off. It was a lot of fun to complete the whole panoply!

It all started with this gorgeous gold & black bustier:


I knew I wanted to turn it into a ballgown by adding a skirt with a LOT of volume. I didn't own such a skirt though, and after a quick search on the web, you realize pretty fast that they're not cheap.

So I started by trying to dye black several old underskirts I had in my childhood costumes, with cheap dye from the supermarket. It didn't turn out quite as planned, but I did keep one of them, dark grey, so black enough, as the basis of the mega-skirt.


I completed by making my own long black tutu skirt, because it's a really easy and cheap option for volume. It was my first time making one, and the result was great:

[TUTORIAL RIGHT HERE]

Finally, I added on top of those a little tutu with a long train behind, from Claire's: mission over-the-top accomplished!

The ballgown was created, however that was not it to reach the total look. I completed with:
an old lace legging,
my cropped lace jacket,
and for structure, accessories:

a black mask, long velvet gloves,  a fan, and coordinated bling.
I only bought the big ring and earrings, all the rest was already in my closet.

But what's a Queen without a crown?

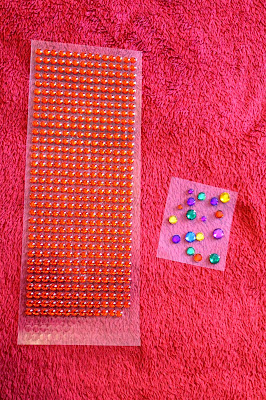
Simply enough, I re-vamped an old cardboard crown (and a second one while I was at it) from la Galette des Rois (the French King Cake) with some gem stickers from the dollar store. You could just as well cut crowns from cardboard paper and spray paint them gold. Then I fixed one on my head with 2 bobby pins, once I had prepped my hair.


For make-up, I used a red lipstick, fake eyelashes and a golden eye-liner to brighten up the eyes beneath the mask.

Ready to party!

I hope all of you had a wonderful time for Halloween!

Monday 3 November 2014

Halloween costume: La Catrina aka Sugar Skull aka Day of the Dead

THE DAY OF THE DEAD


In Mexico, the Day of the Dead is celebrated differently than Halloween. "El Día de los Muertos" as it is today comes from ancient Aztec celebrations associated to Catholic traditions, and both are well-represented ; it is now inscribed in the Intangible Cultural Heritage of Humanity by UNESCO. It is literally a national celebration of Death and of the spirits of the deceased. It can last for 2 or 3 days (as some people start celebrating on the 31st with Halloween) and markets flourish all over the country with skulls and skeletons made of sugar, papier-mâché skeletons and other ornaments. The souls of loved ones are welcomed back with us, specially the spirits of "los angelitos" (the little angels), the kids that passed away too young, on November 1st. The next day, the spirits of the adults join us. At home and in the cemeteries, altars are raised, decorated with photographs of the dead, sugar skulls and ornaments with their names on it, salt, religious symbols and crosses, typical marigold flowers, and even their favorite things, often food and alcohol. Families reunite for the event and go to the cemeteries with these gifts to celebrate the memories of their dead. It's the occasion to have "a last drink" once again with the people who are missed; it is not spooky, it is not gloomy, it is a PARTY.

So let the Fiesta begin!

CATRINA MAKE-UP TUTORIAL


This Halloween I went trick-or-treating for the first time in the US with some friends. Still, I had to honor my Mexican heritage and it was the perfect occasion to be a Sugar Skull, the emblematic decor of the day, the symbolic treat that kids crave. It is a fairly cheap costume to realize as the only thing required is the make-up. La Catrina (or el Catrín for a man) is the popular name associated to a Sugar Skull Lady, representation of Death, after celebrated Mexican art.

The products used: 

From left to right and top to bottom: Bourjois Liner Pinceau eyeliner, Sephora's Outrageous Volume mascara, L'Oréal Le Khôl eye-pencil, a black sparkly eyeliner, Garnier Miracle Skin Perfector concealer, Revlon Colorburst lacquer balm in enticing, Rimmel red lipstick, a black lipstick from Claire's, Kiko long-lasting stick eyeshadow in black, Wet'n'Wild red glitter, Bourgeois Ombre Stretch eyeshadow in black glitter, a big powder brush and an eyeshadow brush.
All of these items are part of my regular make-up bag and are totally interchangeable with what you have in yours. A Sugar Skull make-up can be made totally in white & black, and a lot of them are very colorful: get inventive with what you have!
You can check out other similar make-up on Google or Pinterest to give you ideas.

White cream make-up and gemstone stickers from the dollar store are the only additions to my make-up bag for this Halloween look.

FACE PREP:

Take your hair out of the way and change into your party clothes after the make-up. 
Start by applying a primer/some powder/a bit of concealer to make your face even and hide any red areas/irregularities. 

STEP 1:


Apply white paint all over your face with a big brush or a sponge. You can leave the eyes and nose out as we're gonna paint them later.

STEP 2:

Trace lines around your nose and eyes with your eye pencil to limit the areas to paint. Depending on the make-up you want, you can choose one big circle or two circles around your eyes (an inner circle = small circle including the eyelid + a bigger circle including the eyebrows), if you want two colors for more depth. You don't have to trace perfect circles, as you will improve them while applying the rest of the make-up.

STEP 3:

Paint the delimited areas. For the nose and big eye circles I used Kiko's long-lasting stick eyeshadow ; I love those stick eyeshadows because they make it so easy to apply. I actually painted my eyelids with lipstick, the Revlon Colorburst lacquer balm . I added some mascara and eye-pencil below the eye for more definition.

STEP 4:

Blossom, scary flower! I started by applying the tip of the eyeshadow pencil all around my eyes, to create little rounds; and then I draw around them with black eyeliner to create petals. It doesn't have to be perfect here either; it looks perfectly fine from a step back.


It doesn't show too much on the pictures, but I also drew cat eyes with my eyeliner, applied red sparkly powder (Wet'n'Wild from the dollar store) on my eyelids and redefined both circles with sparkly black eyeliner. Definition, depth, texture. Looked splendid IRL!

/!\ Note: you might want to re-apply some white around your face after finishing the eyes, as you might often brush it out your cheeks on the process.

STEP 5: 

LIPS. You can choose to leave them all white, but I preferred to add some red lipstick. for the dead look though, you can add some depth by applying black (or darker) lipstick just on the inner lips. 
On a skull eyes and mouth look bigger, stripped of the flesh! For the "teeth", just grab your eyeliner and trace a vertical line in the middle of your mouth, on the upper and lower lip. Keep doing the same towards the extremities of your mouth in a symmetrical manner, and trace 2 horizontal lines to extend the parting of your lips. 

STEP 6:


For the hollow cheeks, you can apply a vertical line of black/grey eyeshadow right under your cheekbones, and then trace an vertical/horizontal line toward your chin. Fill it up by applying more eyeshadow under the cheekbone and blurring it off downwards with your brush.

STEP 7:


Time to decorate! Fill in the blanks with your eyeliner or paint by drawing small designs and lines. 

After checking everything looked kinda symmetrical, I finished up the "mask" with small gemstone stickers.

Mission Catrina Accomplished!


COSTUME


I completed the look with a Mexican-looking embroidered black & white dress, a large belt to showcase my waist, a flower headband, and traditional Mexican jewelry. 


Ready to go trick-or-treating!


Stay tuned for my second Halloween costume ;)